Grilled Creamed Corn

What do you do when you get a less-than-stellar bag of fresh corn on the cob? Whine and complain that corn season is coming an end you make creamed corn! When it is at its peak, we have phenomenal fresh corn on the cob in New England. It is so sweet and perfectly tender, we could eat it every night with dinner. Unfortunately, during my last trip to the Farmer’s Market, the corn I bought was somewhat starchy and not nearly as sweet as it usually is. It wasn’t terrible, but it did not live up to my expectations for fresh summer corn. So rather than waste the remaining corn I had purchased, I made this recipe!

Even if you don’t like creamed corn, this is not your average out-of-the-can recipe and you should definitely give it a try! First you grill the corn, which adds a wonderful smoky flavor, then you mix the kernels with a very simple cream cheese sauce. The sauce compliments the corn, without over-powering it, and the end result is a delicious side dish. I saw this recipe on Macaroni and Cheesecake, where she has instructions for roasting the corn in the oven, something we will definitely be trying this winter.

Grilled Creamed Corn

  • 8 ears corn, husked
  • 2 tablespoons butter
  • 2 tablespoons flour
  • 1 1/4 cups milk, plus additional 1-2 tablespoons
  • 3 tablespoons regular or reduced-fat cream cheese
  • Salt and black pepper
  • 1 pinch cayenne pepper (optional)

Preheat a grill to medium-high. Arrange the corn on the grate and grill, turning occasionally, until the kernels are golden-brown and softened, 8 to 10 minutes. Once cool enough to handle, remove the corn kernels from the cobs; discard the cobs. (You should have about 5 cups kernels.) Lower the grill temperature to medium if you plan to complete the corn on the grill.

Heat a large cast-iron skillet over the grate, or over medium heat on the stove-top. Add the butter to melt, then whisk in the flour until combined and foaming, about 2 minutes. Gradually whisk in the milk and cream cheese and cook, whisking constantly, until smooth and thick, 2 to 3 minutes. Stir in the corn kernels; season with salt, black pepper and the cayenne, if using, and cook until heated through, about 1 minute. If the sauce is to thick, add additional milk as needed.

Source: Everyday with Rachel Ray, as seen on Macaroni and Cheesecake.

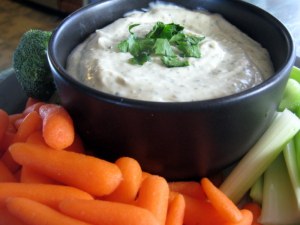
Grilled Artichokes with Garlic-Herb Dipping Sauce

Up until about a month ago, I had never eaten a whole artichoke! For the past month I have eaten at least 2 a week. They are that good and I had no idea what I was missing! I think it was the prep work of the prickly vegetable that intimidated me. Artichoke hearts in a jar, easy peasy. But chopping, cutting, peeling, cooking, removing… who has time for that? I make time now!

Seriously, if you have never cooked your own artichokes, this recipe is a great one, and if you have, you have probably stopped reading since you know how great they are! Oh, and about the sauce. I have heard that many people use just melted butter or plain mayonnaise to dip their artichokes in, but I really think you should try this dipping sauce. It is delicious and perfectly compliments the flavor of the artichokes.

Grilled Artichokes with Garlic-Herb Dipping Sauce

  • 2 tablespoons light or regular mayo
  • 1 heaping teaspoon Dijon mustard
  • 1-2 teaspoons fresh chopped herbs (a combination of rosemary and parsley is my favorite)
  • 1 garlic clove, minced
  • 1 teaspoon red wine vinegar
  • 1 teaspoon lemon juice
  • Kosher salt and black pepper
  • 2 fresh artichokes, washed in cold water
  • 2 tablespoons olive oil

Make the dipping sauce by combining the mayo, Dijon mustard, herbs, garlic, vinegar and lemon juice in a small bowl. Add salt and pepper to taste. Refrigerate while you cook the artichokes.

Heat a large stockpot of water to boiling. To prep the artichokes, cut top 1/3 off with a large, sharp knife. Pull the bottom, tough leaves off and snip the prickly tops off of the rest of the leaves with kitchen shears. Peel the stems with a vegetable peeler.  Place the artichokes in boiling water, cover and cook for 15-20 minutes. The artichokes are done when the base of the artichokes (not the stem, the base of the leaves) is easily pierced with a knife.

While the artichokes are cooking, preheat the grill to medium heat. Drain the artichokes upside down. When cool enough to handle, cut artichokes in half. Scoop out the fuzzy hairs in the artichoke, and discard. Cut again into quarters. Brush the artichokes with olive oil, and sprinkle with salt. Grill the artichokes, turning as needed, until lightly charred. Serve with dipping sauce. 

Source: Adapted from The Thin Chef.

You may also like:

Add to FacebookAdd to DiggAdd to Del.icio.usAdd to StumbleuponAdd to RedditAdd to BlinklistAdd to TwitterAdd to TechnoratiAdd to Yahoo BuzzAdd to Newsvine

Roasted Corn and Sausage Stuffed Tomatoes

These stuffed tomatoes are a combination of a couple different recipes. My mom recently sent me this recipe, after making it herself with rave reviews. That recipe calls for chorizo sausage, jalapeno peppers and pepper jack cheese, but I am not a huge fan of spicy food. I was going to try the chorizo and just ommit the peppers, but at the last minute decided to go with the chicken sausage instead. The combination of roasted corn, tomatoes, onions and the chicken sausage was very good and the flavors all worked perfectly together. I definitely plan on making these again!

013 

Roasted Corn and Sausage Stuffed Tomatoes

  • 3 ears of corn
  • 6 large firm tomatoes
  • 1 package chicken sausage ( I like the roasted garlic flavor), removed from casing
  • 1 tablespoons olive oil
  • 1 medium white onion, finely chopped
  • 2 cloves garlic, finely chopped
  • Coarse salt and freshly ground black pepper
  • 1 tablespoons chopped cilantro leaves
  • 1/3 cup seasoned dry bread crumbs
  • 1 cup grated cheddar jack cheese (use pepper jack if you want a little spice)
  • 1/4 cup grated Parmesan

Preheat oven to 400 degrees. Shuck corn and remove all husks and silk. Place in a baking dish and spray with olive oil cooking spray, sprinkle with salt & pepper. Bake for approximately 20-25 minutes, turning the corn every five minutes. Allow to cool. Remove the corn from the cob and set aside.

Preheat oven to 350 degrees F.

Cut off top third of each tomato. Scoop out seeds, juice and pulp from and discard. Set aside. Chop tomato tops and set aside.

In medium nonstick skillet, saute the chicken sausage in olive oil, breaking it up with a spoon as it cooks. Add onion to skillet and cook until soft, stirring frequently. Add garlic and cook for another 2 minutes, stirring to combine well. Add reserved chopped tomato tops and roasted corn and stir for another minute.

Remove skillet from heat. Mix in cilantro, bread crumbs, and jack cheese. Season with salt and pepper to taste. Using a large spoon, stuff mixture into tomatoes, packing down firmly. Top with Parmesan and place tomatoes in oiled baking dish. Bake until heated through and cheese turns golden, approximately 12-15  minutes.

Source: Inspired by foodnetwork.com and Macaroni and Cheesecake.

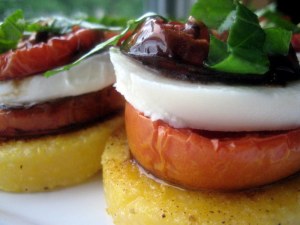
Caprese Stacks on Parmesan Crusted Polenta

I love the flavors of caprese salad, so when I saw this recipe for Caprese Polenta Stacks I immediately starred it to make this summer. Then a couple weeks later I saw this recipe for Roasted Tomato Caprese Salad. I loved the idea of roasting the tomatoes and decided to combine the two recipes into what you see below.

I used a premade polenta log, which can be a bit bland, so I ramped up the flavor by adding some garlic and freshly grated Parmesan cheese. I was so proud of how these came out, they were truly delicious! Roasting the tomatoes adds so much flavor, and stacking everything on top of the polenta  makes for a beautiful presentation. These could serve as an appetizer, side dish or even a light dinner. I certainly plan on making them again several times this summer!

002

Caprese Stacks on Parmesan Crusted Polenta

  • 5-6 roma tomatoes, sliced into rounds
  • 3+ tablespoons olive oil, divided
  • 1  tablespoons balsamic vinegar
  • 2 large garlic cloves, minced
  • 1 teaspoons sugar
  • kosher salt and pepper
  • 1 Polenta log, sliced into 1/4-1/2 inch rounds
  • garlic powder
  • 1/2 cup freshly grated Parmesan cheese
  • 8 ounces fresh mozzarella
  • 4-5 fresh basil leaves, chiffonade
Preheat the oven to 275 degrees F.
Arrange the tomato slices on a sheet pan, in a single layer. Drizzle with 2 tablespoons of olive oil and the balsamic vinegar. Sprinkle with the garlic, sugar, 3/4 teaspoon salt, and 1/8 teaspoon pepper. Roast for 1 hour until the tomatoes are concentrated and begin to caramelize. Allow the tomatoes to cool to room temperature. 
While tomatoes are cooling, heat a flat skillet over medium heat. Add 1 tablespoon of olive oil to the pan. Season individual polenta slices with garlic powder, salt and pepper. Lay polenta slices in a single layer on skillet and cook for 3-4 minutes. Flip polenta over and cook on the other side an additional 2-3 minutes. Flip polenta over again and sprinkle with a small amount of Parmesan cheese, once cheese has melted enough to adhere to polenta, flip the slices over, cheese side down in the pan. Add additional Parmesan to the tops of polenta slices. When the Parmesan on the bottom begins to brown, flip slices over again and cook until both sides have lightly browned and polenta has heated through.
Place polenta slices on a platter, top with a roasted tomato, slice of fresh mozzarella, another tomato and fresh basil. Serve at room temperature.
You may also like:

Corn Casserole

I had never heard of corn casserole until I saw Paula Deen make it a couple years ago and I was intrigued. The texture comes out to be like a very soft cornbread, and flavor is slightly sweet from the corn. Overall, it is very delicious, and though not something I would make every day, it was perfect on Thanksgiving. I omitted the cheese and did make a few other modifications noted below.

img_4269

Corn Casserole

  • 1 (15 1/4-ounce) can whole kernel corn, drained (or frozen works well)
  • 1 (14 3/4-ounce) can cream-style corn
  • 1 (8-ounce) package corn muffin mix (recommended: Jiffy)
  • 1 cup sour cream (I used light)
  • 1/2 cup (1 stick) butter, melted (I used 6 tablespoons)
  • 1 to 1 1/2 cups shredded Cheddar (I omitted)

Preheat oven to 350 degrees F.

In a large bowl, stir together the 2 cans of corn, corn muffin mix, sour cream, and melted butter. Pour into a greased 9 by 13-inch casserole dish. Bake for 45 minutes, or until golden brown. Remove from oven and top with Cheddar. Return to oven for 5 to 10 minutes, or until cheese is melted. Let stand for at least 5 minutes and then serve warm.

Adapted from foodnetwork.com.

Roasted Garlic and Herb Dip

oubgat3

For this weeks Snack Food Sunday, I am going to post some of the appetizers I made for Thanksgiving. First up is this roasted garlic and herb dip. If you like roasted garlic, you will love this dip! The savory garlic blended with the fresh herbs to creates a creamy spread that is perfect dipping. I served this dip with kettle chips and assorted fresh vegetables.

015

Roasted Garlic and Herb Dip

  • 4 heads garlic
  • 2 Tbsp olive oil
  • 1 fresh rosemary sprig
  • 1 fresh thyme sprig
  • 1 1/2 c. sour cream
  • 6 Tbsp mayonnaise
  • 1 1/2 Tbsp chopped fresh rosemary
  • 1 1/2 Tbsp chopped fresh thyme
  • 3 Tbsp chopped fresh flat-leaf parsley
  • 3/4 tsp Worcestershire sauce
  • 2 tsp fresh lemon juice
  • 1 1/2 tsp kosher salt
  • Freshly ground pepper, to taste

Preheat an oven to 400 degrees. Cut off the tops of the garlic heads and rub the cut surface with the olive oil. Put the garlic in a garlic roaster or on a baking sheet. Arrange the rosemary and thyme sprigs on or around the garlic. Cover the garlic roaster with the lid or the baking sheet with aluminum foil. Roast until the garlic cloves are soft and lightly browned, about 1 1/4 hours. Let cool completely (this can done ahead of time).

Squeeze the pulp from the garlic cloves into the container of an immersion blender or into a bowl of a food processor. Add the sour cream, mayonnaise, chopped rosemary, thyme and parsley, the Worcestershire sauce, lemon juice, salt and pepper. Blend until well combined. Cover the dip with plastic wrap and refrigerate for at least 30 minutes. Makes about 3 cups.

Recipe from Good Things Catered, originally from Williams-Sonoma.

Barefoot Bloggers: Herb Roasted Onions (and Potatoes)

The night that I made these onions, I was already planning on having roasted potatoes as well. So when I was looking over the recipe, I figured that the potatoes would be equally delicious tossed in the herb mixture and I was right! We had these with broiled ribeye steaks with garlic chive butter and it was a very delicious dinner.

This Barefoot Bloggers recipe was chosen by Kelly at Baking with the Boys. Love the Barefoot Contessa and want to cook along with us? Check out the details here! This recipe can be found in Barefoot Contessa at Home, or at foodnetwork.com.

085

Herb Roasted Onions and Potatoes

  • 2 sweet yellow onions
  • 3-4 red potatoes 
  • 1/4 cup freshly squeezed lemon juice
  • 2 teaspoons Dijon mustard
  • 2 teaspoons minced garlic (2 cloves)
  • 1 tablespoon minced fresh thyme leaves
  • 1 1/2 teaspoons kosher salt
  • 1/2 teaspoon freshly ground black pepper
  • 1/2 cup good olive oil
  • 1 tablespoon minced fresh parsley leaves

Preheat the oven to 400 degrees F.

Remove the stem end of each onion and carefully slice off the brown part of the root end, leaving the root intact. Peel the onion. Stand each onion root end up on a cutting board and cut the onion in wedges through the root. Place the wedges in a bowl.

For the dressing, combine the lemon juice, mustard, garlic, thyme, salt, and pepper in a large bowl. Slowly whisk in the olive oil. Pour the dressing over the onions and toss well.

With a slotted spoon, transfer the onions to a sheet pan. Scrub and quarter red potatoes, toss with remaining dressing. Transfer the potatoes to the sheet pan with the onions, reserving the vinaigrette that remains in the bowl. Bake the onions and potatoes for 30 to 45 minutes, until tender and browned. Toss once during cooking. Remove from the oven, and drizzle with the reserved dressing. Sprinkle with parsley, season to taste and serve warm or at room temperature.

Adapted from Barefoot Contessa at Home.

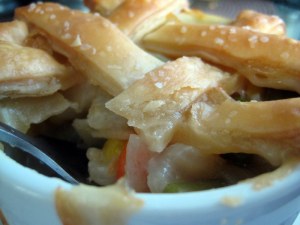
Barefoot Bloggers: Vegetable Pot Pie

This Barefoot Bloggers recipe was the second October recipe, and was chosen by Deb at Kahakai Kitchen. I was a bit late in making this, but it was well worth the wait! To me, the best part of a pot pie is the flaky, buttery crust. Naturally, Ina’s recipe did not disappoint. I did make make a few substitutions to make this a more traditional pot pie, and will add some chicken next time.

Vegetable Pot Pie

  • 12 tablespoons unsalted butter (1 1/2 sticks)
  • 2 cups sliced yellow onions (2 onions)
  • 1 fennel bulb, top and core removed, thinly sliced crosswise (omitted)
  • 1/2 cup all-purpose flour
  • 2 1/2 cups good chicken stock
  • 1 tablespoon Pernod (omitted)
  • Pinch saffron threads
  • 1 1/2 teaspoons kosher salt
  • 1/2 teaspoon freshly ground black pepper
  • 3 tablespoons heavy cream
  • 1 1/2 cups large-diced potatoes (1/2 pound)
  • 1 1/2 cups asparagus tips (subbed green beans)
  • 1 1/2 cups peeled, 3/4-inch-diced carrots (4 carrots)
  • 1 1/2 cups peeled, 3/4-inch-diced butternut squash (subbed corn)
  • 1 1/2 cups frozen small whole onions (1/2 pound) (subbed frozen peas)
  • 1/2 cup minced flat-leaf parsley
  • For the pastry:
  • 3 cups all-purpose flour
  • 1 1/2 teaspoons kosher salt
  • 1 teaspoon baking powder
  • 1/2 cup vegetable shortening
  • 1/4 pound cold unsalted butter, diced
  • 1/2 to 2/3 cup ice water
  • 1 egg beaten with 1 tablespoon water, for egg wash
  • Flaked sea salt and cracked black pepper

Melt the butter in a large pot over medium heat. Add the onions and fennel and saute until translucent, 10 to 15 minutes. Add the flour, reduce the heat to low, and cook for 3 more minutes, stirring occasionally. Slowly add the stock, Pernod, saffron, salt, and pepper, and bring to a boil. Simmer for 5 more minutes, stirring occasionally. Add the heavy cream and season to taste. The sauce should be highly seasoned.

Cook the potatoes in boiling salted water for 10 minutes. Lift out with a sieve. Add the asparagus, carrots, and squash to the pot and cook in the boiling water for 5 minutes. Drain well. Add the potatoes, mixed vegetables, onions, and parsley to the sauce and mix well.

For the pastry, mix the flour, salt, and baking powder in the bowl of a food processor fitted with a metal blade. Add the shortening and butter and mix quickly with your fingers until each piece is coated with flour. Pulse 10 times, or until the fat is the size of peas. With the motor running, add the ice water; process only enough to moisten the dough and have it just come together. Dump the dough out onto a floured board and knead quickly into a ball. Wrap the dough in plastic and allow it to rest in the refrigerator for 30 minutes.

Preheat the oven to 375 degrees F.

Divide the filling equally among 4 ovenproof bowls. Divide the dough into quarters and roll each piece into an 8-inch circle. Brush the outside edges of each bowl with the egg wash, then place the dough on top. Trim the circle to 1/2-inch larger than the top of the bowl. Crimp the dough to fold over the sides, pressing it to make it stick. Brush the dough with egg wash and make 3 slits in the top. Sprinkle with sea salt and cracked pepper. Place on a baking sheet and bake for 1 hour, or until the top is golden brown and the filling is bubbling hot. I made a lattice top on mine.

This recipe can be found in Barefoot Contessa Parties, page 255.

Barefoot Bloggers: Butternut Squash Risotto

Yay! I am posting this on time! I have been a bit behind with my Barefoot Bloggers posts lately, and I never even made Cream of Mushroom Soup that Chelle picked last month (in my defense though, I despise mushrooms). I honestly was not planning on making this until next week, but my husband is out of the house for dinner tonight, so I knew it was the perfect opportunity. He does not like squash, or really care for risotto (crazy, I know).

Thank you to Rachel, of Rachel Likes to Cook,for picking this fantastic fall recipe, it was delicious! I like butternut squash, but I was a bit skeptical about having it in risotto, but it really was the perfect combination. I halved this recipe, since it was just for me and I still have enough for lunch the next two days. I also subbed bacon, since my grocery store was out of pancetta and ommitted the saffron since they were out of that as well (are there other Barefoot Bloggers in my town buying this stuff up?).

This recipe comes from Barefoot Contessa Family Style.

Butternut Squash Risotto

  • 1 butternut squash (2 pounds)
  • 2 tablespoons olive oil
  • Kosher salt and freshly ground black pepper
  • 6 cups chicken stock, preferably homemade
  • 6 tablespoons (3/4 stick) unsalted butter
  • 2 ounces pancetta, diced
  • 1/2 cup minced shallots (2 large)
  • 1 1/2 cups Arborio rice (10 ounces)
  • 1/2 cup dry white wine
  • 1 teaspoon saffron threads
  • 1 cup freshly grated Parmesan

Preheat the oven to 400 degrees F.

Peel the butternut squash, remove the seeds, and cut it into 3/4-inch cubes. You should have about 6 cups. Place the squash on a sheet pan and toss it with the olive oil, 1 teaspoon salt, and 1/2 teaspoon pepper. Roast for 25 to 30 minutes, tossing once, until very tender. Set aside.

Meanwhile, heat the chicken stock in a small covered saucepan. Leave it on low heat to simmer.

In a heavy-bottomed pot or Dutch oven, melt the butter and saute the pancetta and shallots on medium-low heat for 10 minutes, until the shallots are translucent but not browned. Add the rice and stir to coat the grains with butter. Add the wine and cook for 2 minutes. Add 2 full ladles of stock to the rice plus the saffron, 1 teaspoon salt, and 1/2 teaspoon pepper. Stir, and simmer until the stock is absorbed, 5 to 10 minutes. Continue to add the stock, 2 ladles at a time, stirring every few minutes. Each time, cook until the mixture seems a little dry, then add more stock. Continue until the rice is cooked through, but still al dente, about 30 minutes total. Off the heat, add the roasted squash cubes and Parmesan. Mix well and serve.

Dill Pickles

When I saw these pop up on Melissa’s Blog, I thought they would be so much fun to make! If you even like pickles at all, you will love these. There is something about fresh, homemade pickles that is just so much better than the store bought. Not to mention how pretty they look with the fresh dill and garlic in the mason jars. I ended up with seven 1/2 pint jars of pickles and gave most of those away, but I did save a couple jars for us as well. Next summer I will definitely be making these again, I think I would like to try making Bread and Butter Pickle chips as well.

Refrigerator Dill Pickles

  • 3 cloves garlic, minced
  • fresh dill
  • cucumbers (I used 5 regular sized pickles, cut into spears)
  • Brine:
  • 3 cups water
  • 6 TBSP white vinegar
  • 3 TBSP Kosher salt

Put some of the fresh dill in the bottom of each jar. Pack 1/2 full with cucumbers. Lay more fresh dill on top and finish filling the jar with cucumbers. Put minced garlic on top (about 3/4 teaspoon), pour brine into jar until it’s full. Put the lid on, and leave them in the refrigerator for 2 days before using. I found these were better the longer they sat in the refrigerator, I would recommend at least 3-4 days.